Bonus: Are you looking to cut down on homebuilding costs by DIY-ing your home projects? Check out this article for help to save even more time and money!
What Does it Cost to Finish a Basement?
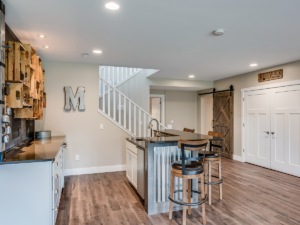
Looking to finish your modular home basement on a budget? A DIY finished basement could be the perfect solution for you. By doing it yourself, you can save on labor fees and free up extra space in your home. But, how much will it cost to achieve that cozy basement of your dreams? Of course, the cost will vary depending on the size of your basement, hookups needed and any materials you use so lets look at coming up with those numbers together so there’s no surprises!
To begin, you’ll need a plan for how you want to use your space, whether it’s for storage, living space, or a hobby area. Once you have a plan, you can start on the prep work, which includes determining if you need flooring, plumbing, electrical work, or drywall. Be sure to plan ahead for any building codes and permits you may need to meet.
Remember, the best way to save money is to develop (and stick to) a budget. This will keep you from going overboard when you purchase materials and help you make wise spending decisions.
MVT – Most Valuable Tip: This is not to be confused with Mean Value Theorem but it’s my own little phrase so that you can easily find the most valuable piece of information I can give to you! So here it is….Online Pickup Order 🤯 My favorite way to stick to a budget is to go to my favorite hardware store online.
I put the materials in my ‘cart’ and order for pickup. You go to the store then, get your items right to your car without all the noise and confusion. This way is much easier to strategically buy the things you need when you can sit down at your table, add and put away things in your ‘cart’ as needed without having to walk all around a big box store. Order pickup, avoid lines and prevent sticker shock!
Your Guide to a DIY Finished Basement
So, how exactly can you DIY a finished basement? Let’s start with this 8 step process to get your ideas rolling and go from there.
Step 1. Plan
The first step to beginning this sort of project is to PLAN. You will need to decide what you want to do with your space. Do you want the space for storage, for extra living space, or as an area to work on a particular hobby?
Once you are settled on how the floor space will be used, you can begin determining its overall look.
Step 2. Prepare
Before you touch a hammer to a nail, you will need to decide if the way you plan to use this space requires flooring, plumbing, electrical work, drywall, etc. If you’re struggling in this area even after researching, hiring an architect can make this step seamless.
Because building codes and permits may need to be met and accessed in this type of project, you will be required to determine a plan before you begin. This information can be found by contacting your local building inspection department.
List of local Building Permit websites:
- South Bend, IN
- Goshen, IN
- Mishawaka, IN
- Grand Rapids, MI
- Detroit, MI
- Milwaukee, WI
- Chicago, IL
- Fort Wayne, IN
Like visualization? Here’s a free 2D layout tool to help design your basement space.
Step 3. Frame the Basement
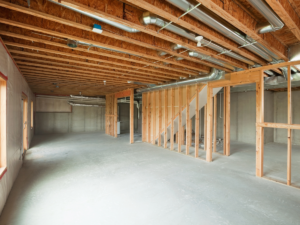
Once the plan is in place, you can start framing the basement. You have the option of doing steel or wood studs here. Steel is lighter, stronger and flame resistant while wood is flammable but much cheaper. Although, there was a time not too long ago where wood was harder to come by and thus more expensive than steel.
Don’t forget insulation! On top of keeping your basement energy efficient, many localities have a minimum R-value that you must obtain to remain code compliant. R-Value is the measurement used to determine the insulating value of the insulation. The higher the R-Value, the more efficient it will be. You will have several options available to you, some less expensive than others. Keep in mind your intended application and budget. Fiberglass batt is one of the more inexpensive choices but can be an itchy material to work with. However, rigid foam board insulation is cost effective, moisture resistant and good quality. Alternatively, If you’re looking for fire resistance, Mineral wool (aka RockWool) is the way to go. When installing the insulation, make sure your insulation is installed facing the right direction!
Step 4. Install Walls
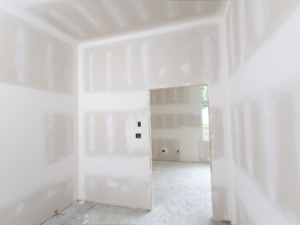
Once your basement framing is good to go, it’s time to put up the walls. Drywall, wood, wall panels, tile, etc. are all good options for the basement, but make sure you weigh the pros and cons ahead of time.
Additionally, you should consider your basement’s climate. Fiberglass mat and paperless drywall is ideal for basements because it offers moisture protection.
Step 5. Hookups
Once the necessary framing and insulation is in place, it’s time to install plumbing and electrical systems for your washer, dryer, and bathroom facilities. If you plan to use the basement as an apartment or an entertainment area, it’s important to ensure that these hookups are installed correctly to prevent any potential safety hazards. While basic hookups for appliances like washers, dryers, and water heaters can be done yourself, it’s recommended to hire a professional electrician for wiring to ensure safety and code compliance.
Step 6. Flooring
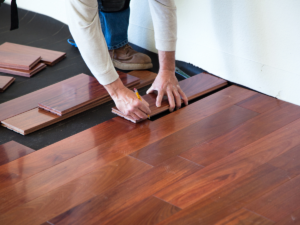
You may want to leave that slab of concrete as is. However, you can also choose from many affordable basement flooring options such as:
- Laminate
- Regular Tile
- Sticky Tiles
- Hardwood
- Carpet Tiles
Step 7. Ceiling

Choose from a number of ceiling types, including:
- Conventional Ceiling
- Suspended Ceiling
- Beam Ceiling
- Tray Ceiling
There are different types of ceiling materials available for finishing a modular basement, including popcorn, wood, and tile. While it’s important to consider practicality, such as durability and ease of maintenance, it’s also crucial to think about the desired style or aesthetic effect that the ceiling will create.
Step 8. Paint
After the major construction work is completed in the basement, it’s time to start the decorative phase. While many people prefer painting the walls over using wallpaper, it’s important to select a method that complements the ceiling and flooring style. Consider the existing color scheme, lighting, and furniture in the room to choose a paint color or wallpaper pattern that ties everything together.
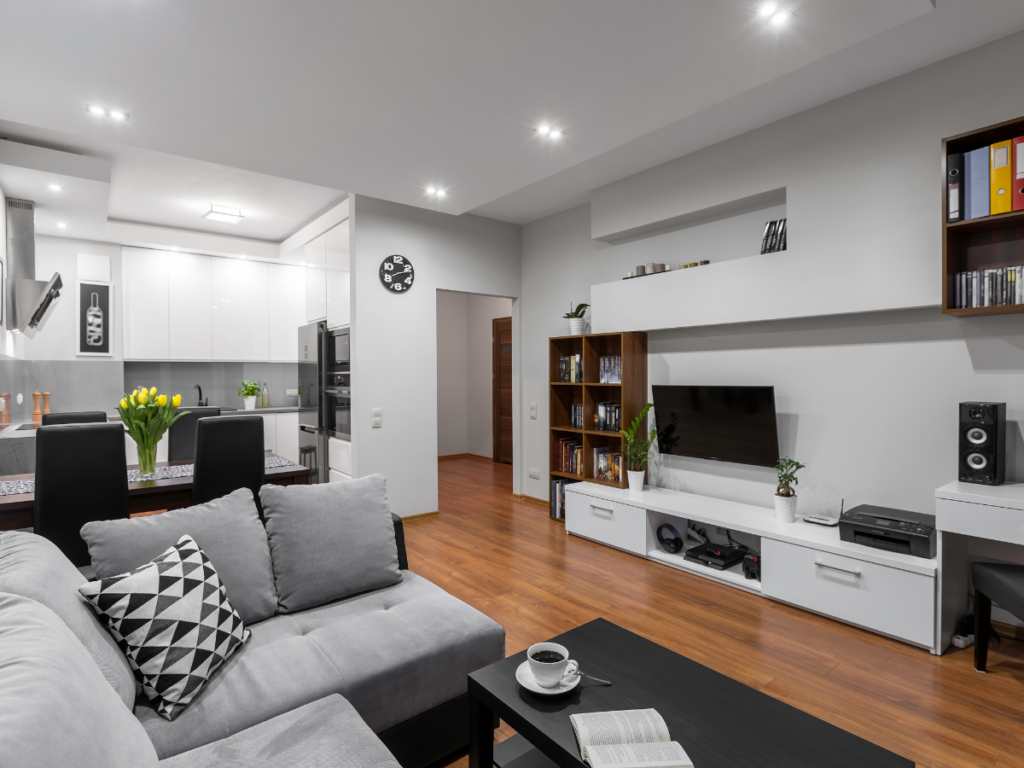
Step 9. Finishing Touches
Now comes the exciting part of finishing your basement! Make it feel more like home by adding furniture, decor, and other items to the space. To start, install any necessary storage solutions like shelves and closets. Next, thoroughly clean and organize the area. Finally, enhance the look and feel of the room by decorating it with furniture, wall art, and rugs. Rugs are particularly helpful for basements with laminate flooring as they add warmth and texture to the room while preventing the floor from feeling too cold.
If you’d like to know more about the benefits of modular homebuilding, do not hesitate to call us today. At Next Modular, we know that choosing a home is likely one of the most important financial decisions you will make. As an experienced modular home builder, we are committed to being your guiding light through this process.